How To Install Lowering Springs on BMW F80 M3 & F82 M4
Lowering your BMW M3 or M4 is one of the best things you can do to these cars. It improves both handling and appearance with one modification. I researched options for hours, debating between lowering springs, HAS kits and coilovers. I narrowed my choice down to Emmanuele Design lowering springs. If you want to know why I recommend them over other options, read my review on EMD lowering springs.

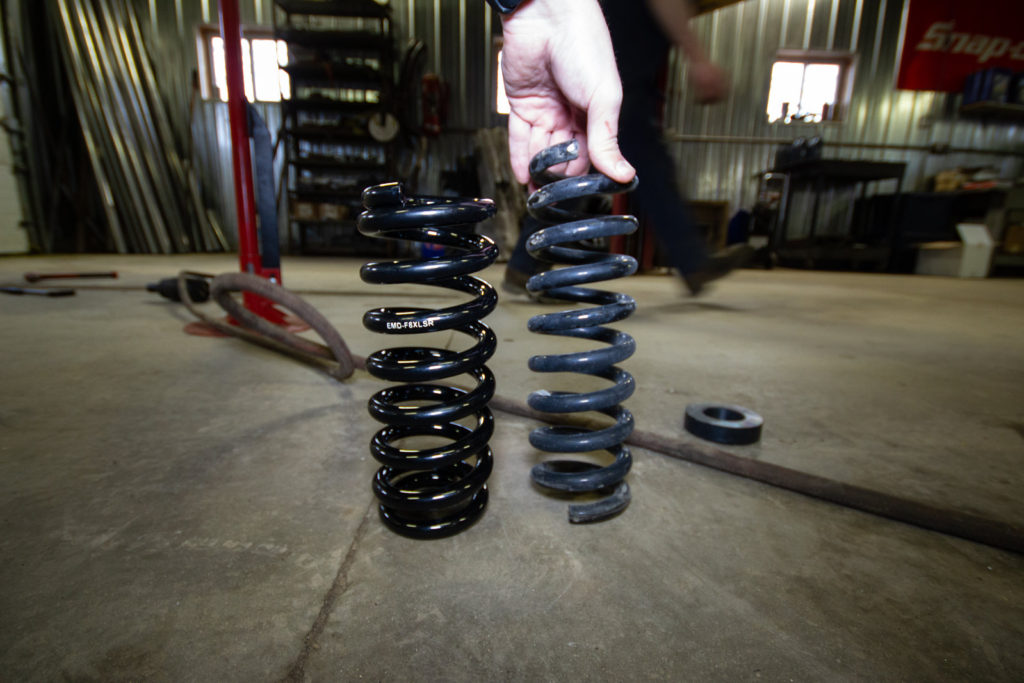
Stock springs 
EMD springs
I have experience installing suspension kits in various BMWs. It surprises me how easy these are to install in a BMW F80 M3! Anyone with mechanical experience or knowledge should be able to do this at home.
Required tools:
- 18mm BMW strut nut socket
- 17mm BMW wheel-saver socket
- Small 10mm angled wrench
- Trim removal tool set
- Torque wrench (1/2″, 10-150 ft/lbs)
- Impact wrench (1/2″)
- Ratchet wrench (1/2″)
- 10-24mm socket set (1/2″) (*21mm, 16mm, 10mm)
- 8-22mm wrench set (*21mm, 9mm)
- T10-T50 star key wrench set (*T30)
- 6-12mm nut driver set (*10mm)
- Screwdriver set
- Low-profile floor jack
- Jack stands
- BMW jack pad adapters
First things first!
Start by using a low-pro floor jack, QuickJack floor lift or MaxJax 2-post lift to raise the car off the ground. I have experience with all three of these lifting methods and would recommend each of them depending on your situation. Use BMW jack pad adapters no matter which lifting method you choose. Be sure to properly secure the car with jack stands if not using a lift. For this install, I’ll be using a 2-post lift.
With the car in the air, use a 1/2″ cordless impact wrench with a 17mm BMW wheel-saver socket to remove the lug bolts. Carefully remove each wheel from your BMW M3 or M4 and set aside.
Let’s start with the front suspension
Before installing our new lowering springs, we need to remove the OEM springs first. Start in the front by opening the hood and removing the rubber top-hat cover and plastic cowl on each side.

To remove the rubber top-hat cover, use a trim removal tool to un-clip six plastic push rivets (red arrows). Use a 10mm nut driver to loosen the plastic nuts (green arrows). Be careful not to break these nuts, they only require a 1/4 turn to loosen.
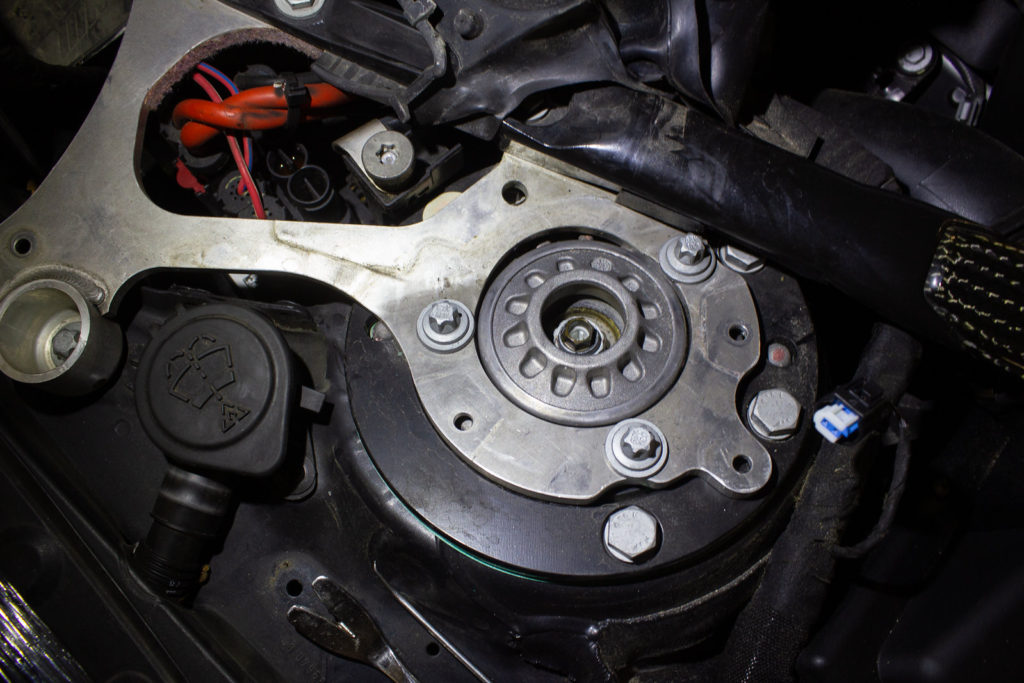
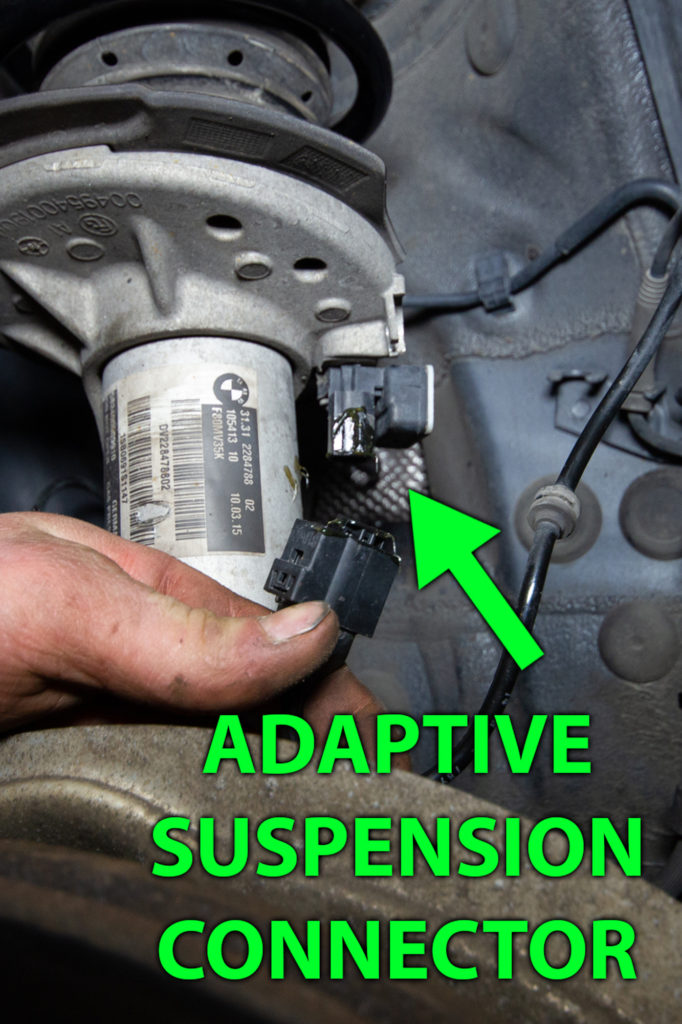
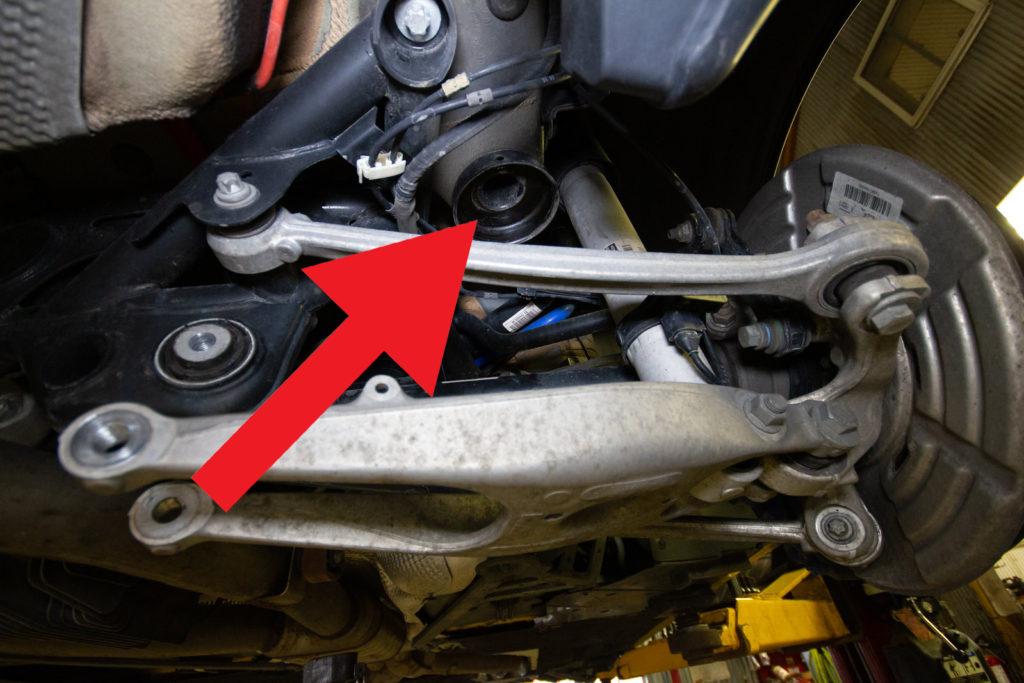
With the main top-hat cover and plastic cowl removed, you should see a smaller rubber cover directly on top of the strut top. Remove this with a plastic pry tool. If you have adaptive suspension, pop off the electric connector on top of the strut.
At this point, we’re going to go back under the car and use a jack to compress the suspension on this corner. Lift the control arm until the suspension is completely compressed and on the verge of lifting the corner of the vehicle from your lift arm or jack stand.
Front spring removal
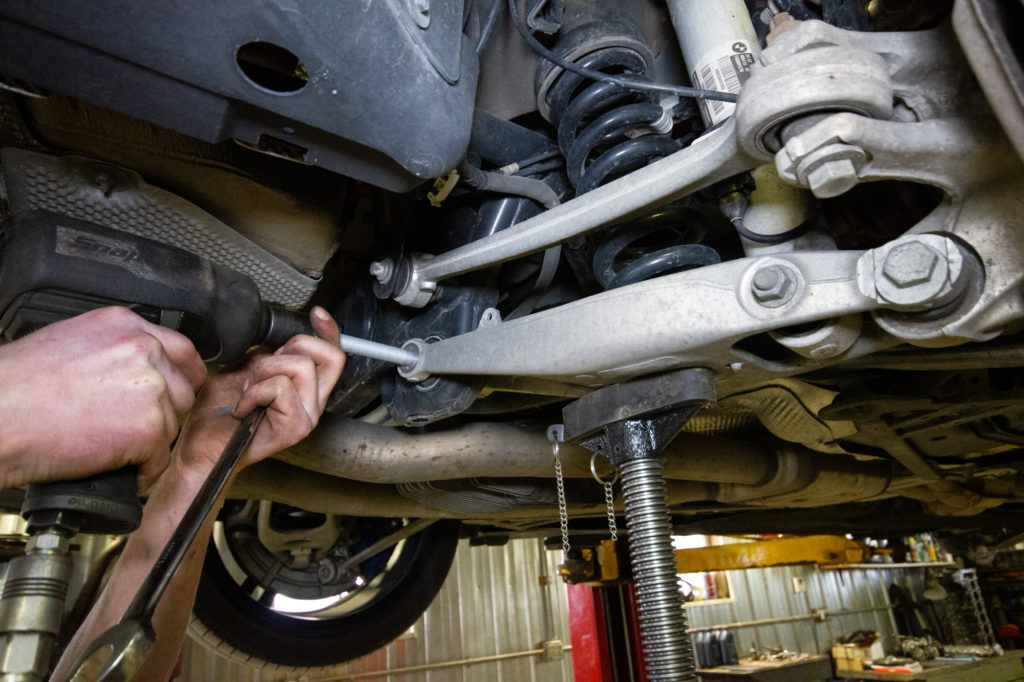
With the suspension compressed, we need to remove the sway bar end link, unplug the adaptive suspension sensor (if applicable), disconnect the headlight-leveling sensor (driver-side only), and unclip wires for the brake pad sensor and wheel speed sensor.
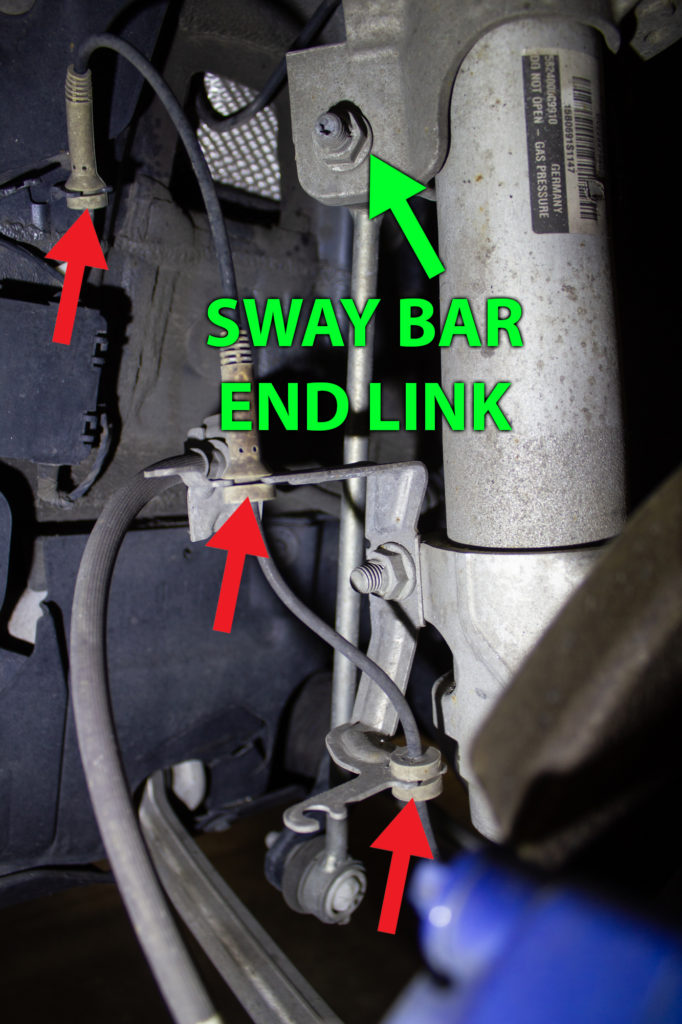
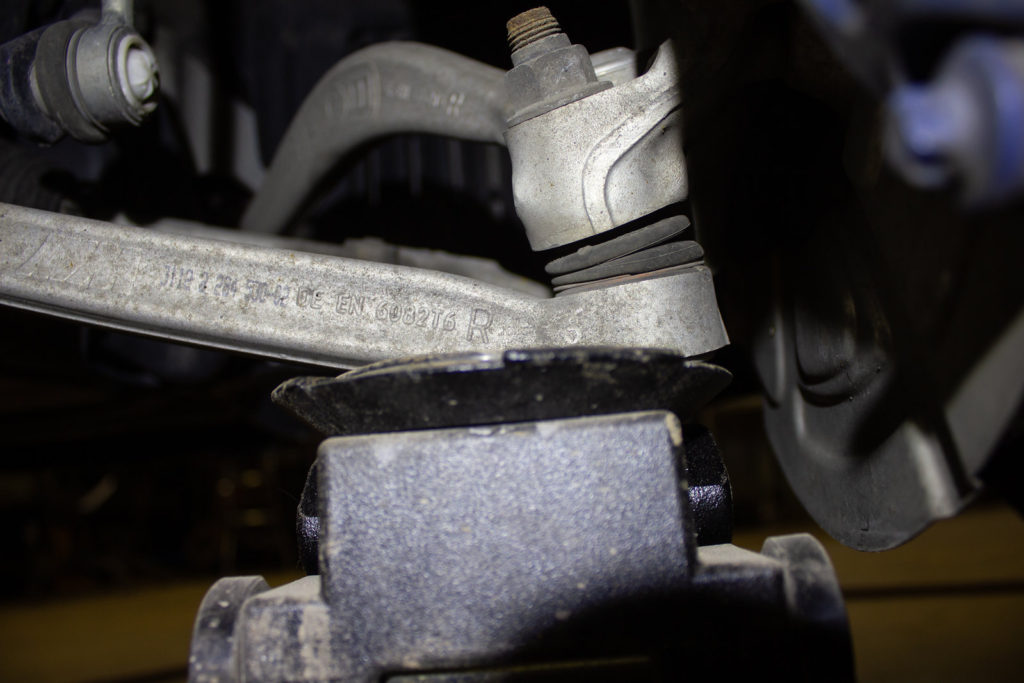
Disconnect the sway bar end link by removing the nut with a 16mm socket and impact wrench, or by using a 16mm wrench on the nut while holding the threads with a T30 torx wrench.
Remove the driver’s side headlight-leveling sensor by loosening the nut with a 10mm socket. Be sure to hold the joint of the headlight-leveling sensor with a 9mm wrench while loosening the nut (not pictured, reference video at the top of this post).
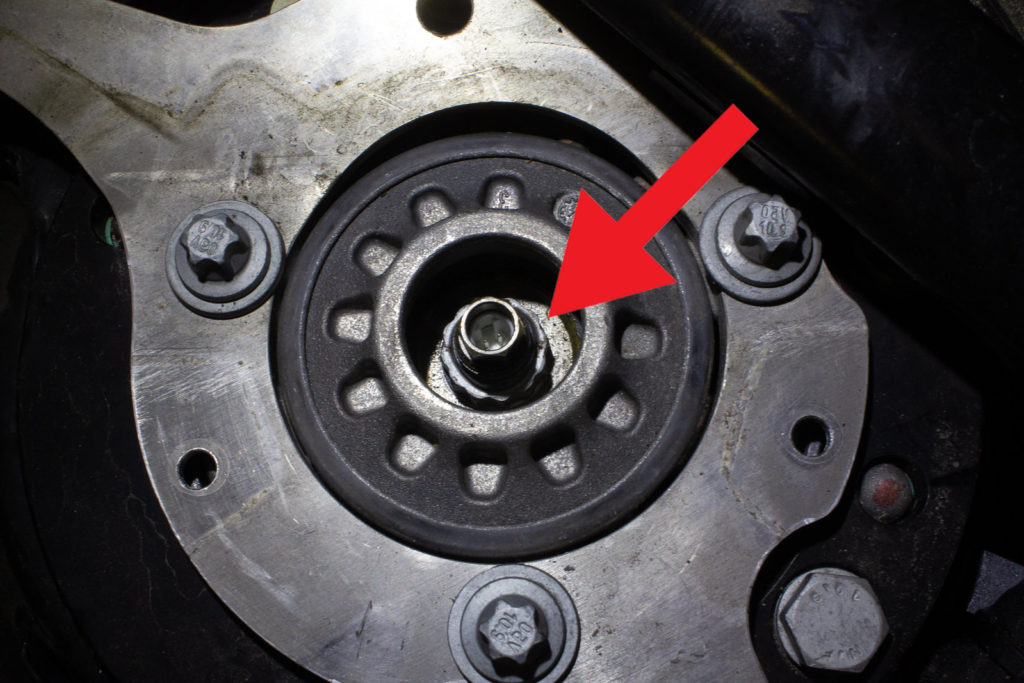
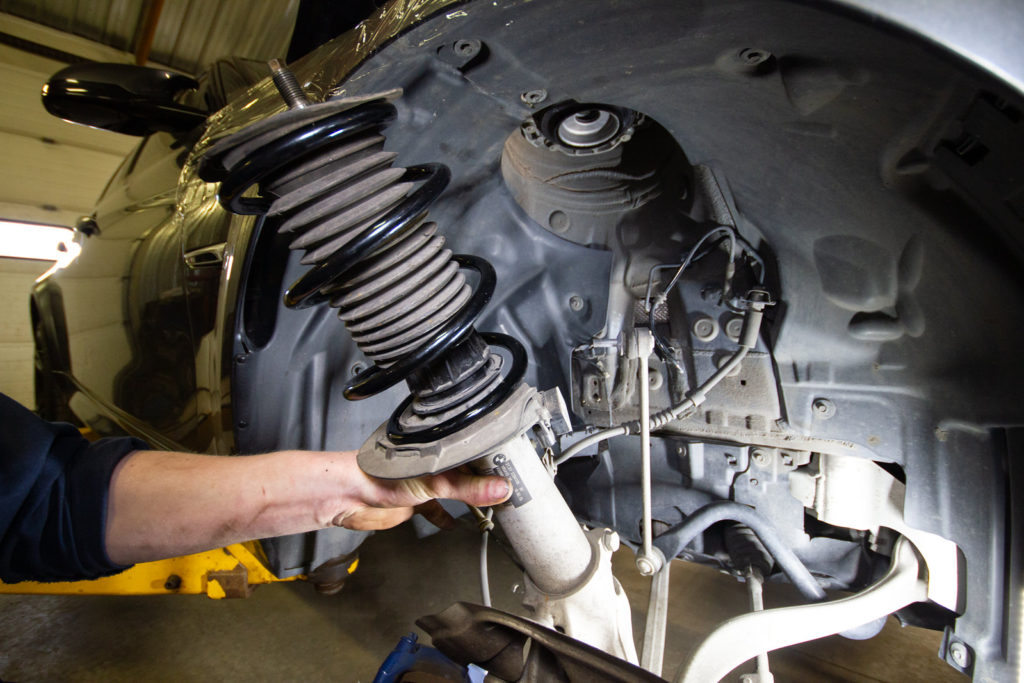
With all of the above items disconnected and the floor jack still compressing the suspension, let’s head back up to the engine bay. Use a deep 12-point 18mm socket or the strut nut socket with the impact wrench to remove the nut on the top of the strut.
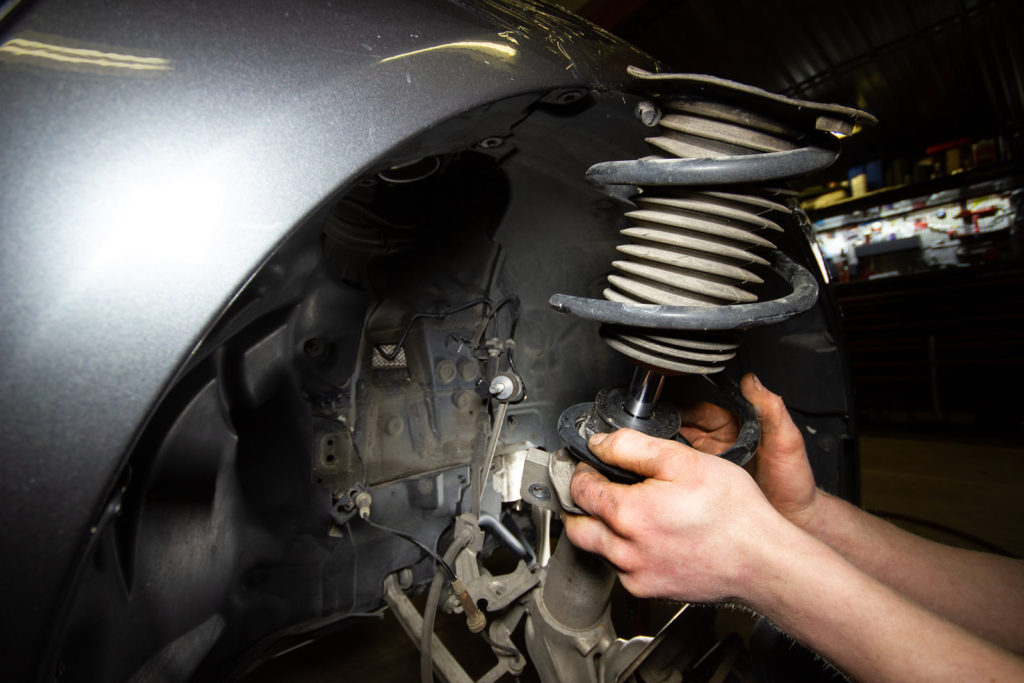
Once the nut is removed, slowly lower the floor jack to naturally decompress the spring and free the strut. Carefully pull the strut and spring outside of the fender well to remove the OEM spring, dust boot and bump stop.
Install front lowering springs
Replace the OEM spring with one of your front EMD lowering springs. Re-use the dust boot and bump stop. Ensure the spring is properly seated on the strut, then re-insert the strut into the top hat.
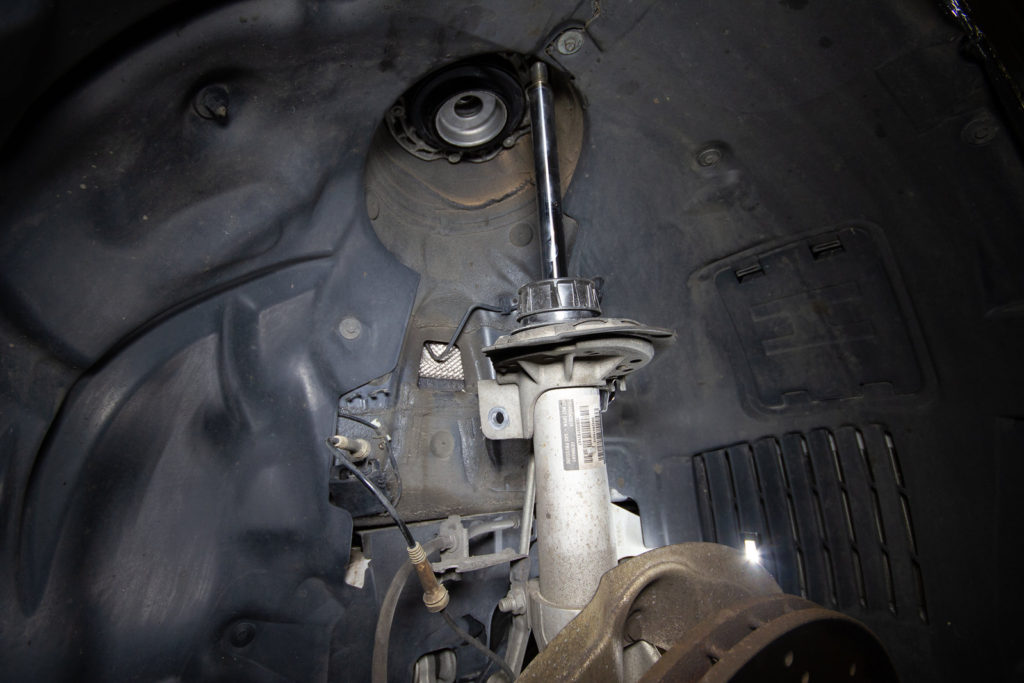
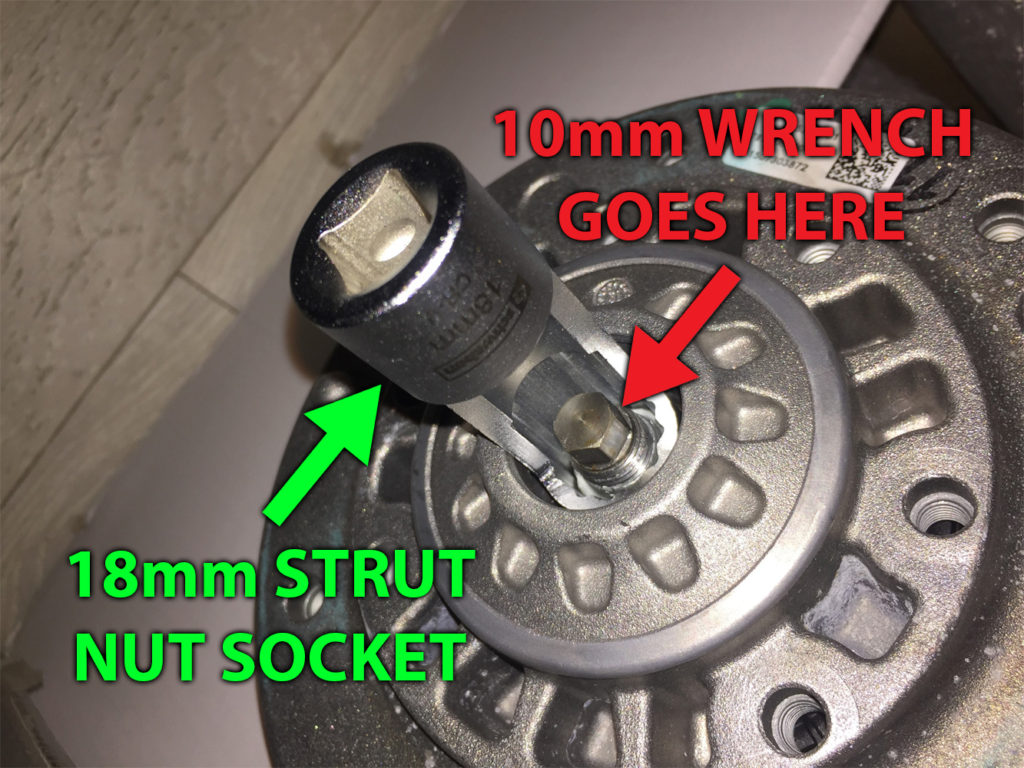
Jack up the control arm to compress the suspension again, while guiding it into the top hat. Use a torque wrench with a specialty 18mm strut nut socket and small 10mm wrench to tighten the 18mm nut on the top of the strut to 25 ft/lbs.
Re-install the sway bar end link and tighten the 16mm nut to 44 ft/lbs. Then connect the adaptive suspension sensor, headlight-leveling sensor and other previously-removed wires. In the engine bay, plug in the adaptive suspension sensor and install the rubber dust caps and plastic cowl.
Re-inspect the whole area, making sure everything is connected and all nuts are tight. You’ve successfully completed the first corner! Repeat the same process on the other front side.
Remove OEM rear springs
Get started in the rear by supporting the spring arm with a jack, compressing the suspension. You can see the tall adjustable jack stand we used, but you can use a floor jack if you don’t have a lift.
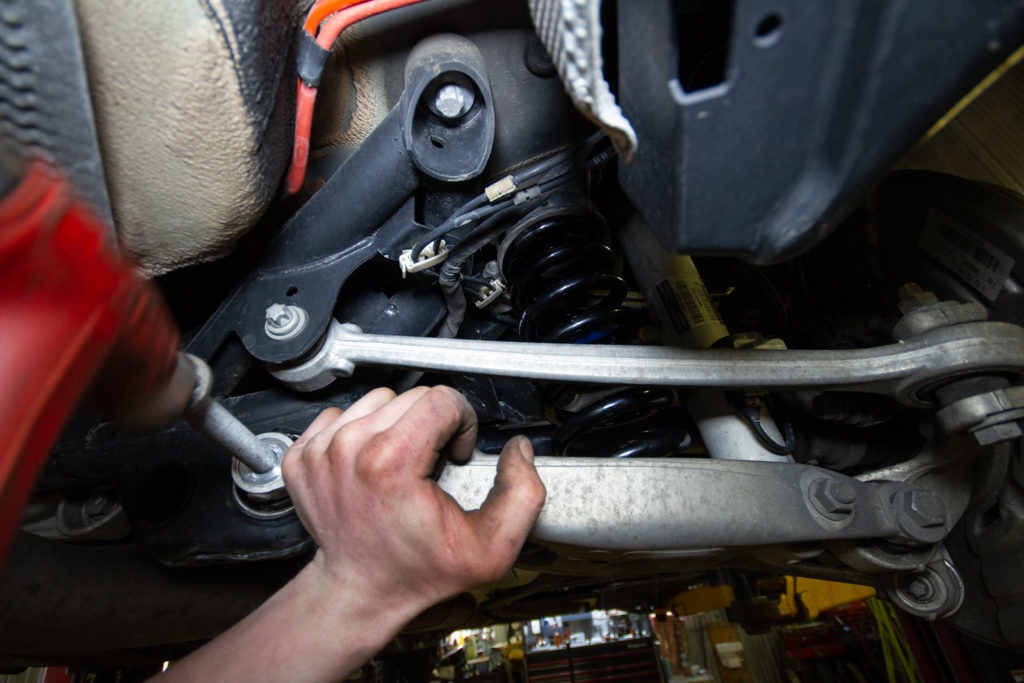
Use a 21mm socket and the impact wrench to remove the inner spring arm bolt, hold the nut on the backside with a 21mm wrench if needed. On the driver’s side, there is another headlight-leveling sensor that needs to be removed. To do that, remove the nut with a 10mm socket while holding the joint with a 9mm wrench.

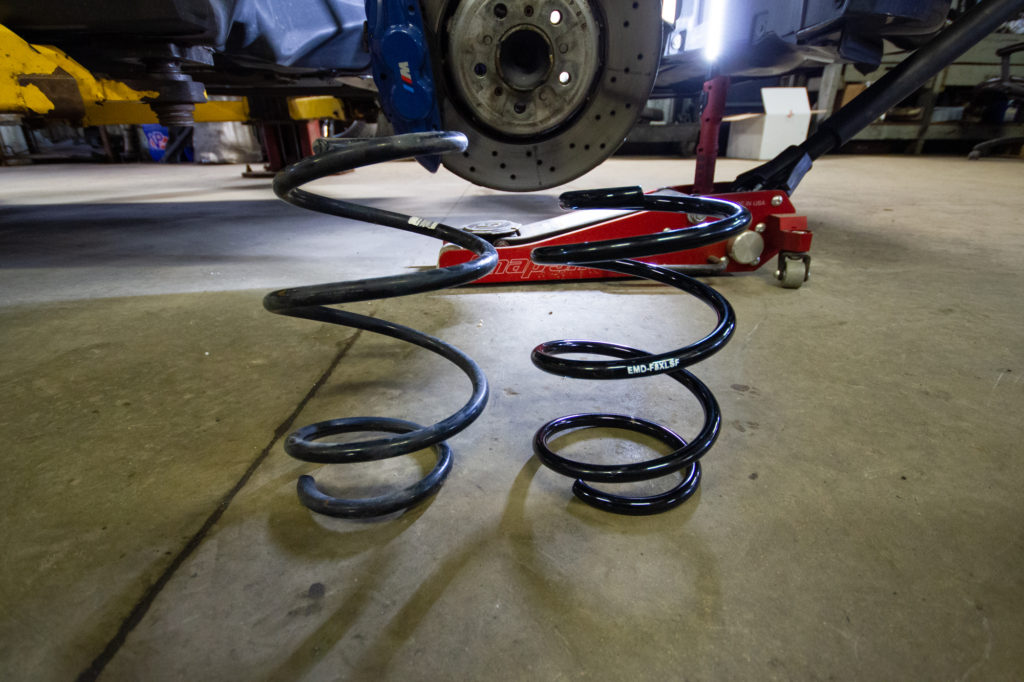
With the bolt removed, lower the jack to naturally decompress the spring, then pull the spring arm down to remove the OEM spring. Before installing your new springs, pay attention to the instructions for your lowering springs. In my case, EMD lowering springs include a spacer that can be inserted on top of the upper spring cup for a less aggressive drop.
To install spacers, use a pry tool to remove the metal upper spring cup. Insert the spacer on top of the cup and re-install the cup into the chassis of the car. Other lowering spring kits like Macht Schnell include two spacers for each spring, one that goes on top of the cup and another that goes inside of the cup. Not all lowering spring kits include spacers, so pay attention to what is included with your lowering springs.
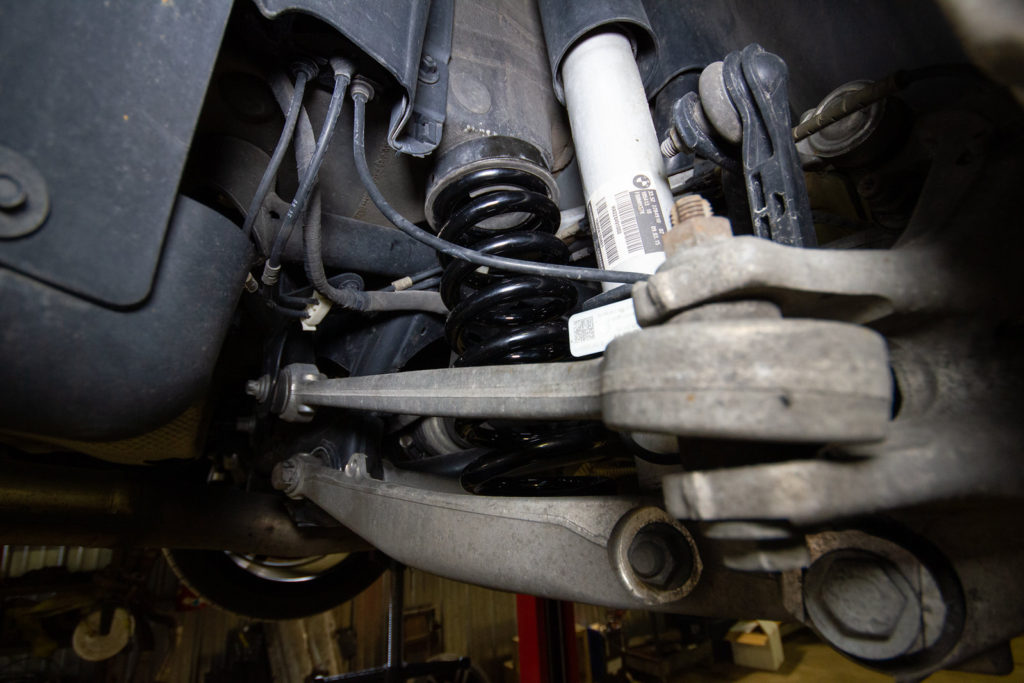
Install rear lowering springs
Install the necessary spacers (if applicable), then replace the stock springs with your new lowering springs. Re-use the rubber spring isolators from the top and bottom of your stock springs. After transferring them over, insert your new spring into the spring cup and seat it in the bottom of the spring arm.
Use the jack to lift the spring arm until you can re-insert the 21mm bolt into the spring arm. Once the bolt and nut are hand-tight, use the jack to compress the suspension. Once compressed, use a torque wrench to tighten the bolt to 120 ft/lbs. Re-connect the headlight-leveling sensor on the driver’s side.

Just like you did after completing the front, inspect the whole are. Make sure the spring is seated properly and all nuts are tight. Repeat the same process on the other rear side.
Re-install your wheels and tighten lug bolts to 105 ft/lbs with the 17mm wheel-saver socket and torque wrench. Lower the car back onto the ground and admire your freshly installed lowering springs!
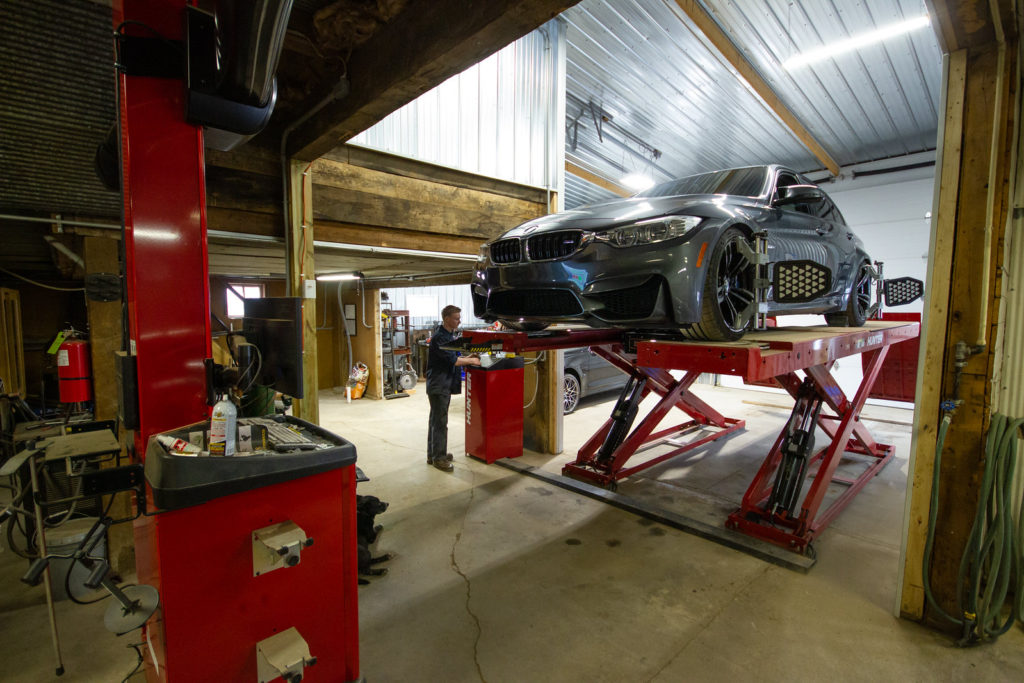
As with any suspension adjustment or modification, a 4-wheel alignment is necessary. If you don’t get an alignment, you risk poor handling or uneven tire wear.
Enjoy a few photos of my 2015 BMW M3 after installing Emmanuele Design lowering springs!


Let me know what you think by leaving a comment below. Contact me if you have any questions!
One Reply to “How To Install Lowering Springs on BMW F80 M3 & F82 M4”
Comments are closed.